Wednesday, March 30, 2011

Mini me

I have some extra wood from building the chair, and decided to make a few scale replicas. These are built to 1:4 scale size, and stand about 7" tall. I think I'll make them in cherry color, natural, and white. Not sure what the cost will be at the moment, but it shouldn't be too bad. Let me know if you are interested in one.

The first baby steltman


Rietvelds' grandson Egbert holding a scale Steltman


Monday, March 28, 2011

That's all she wrote

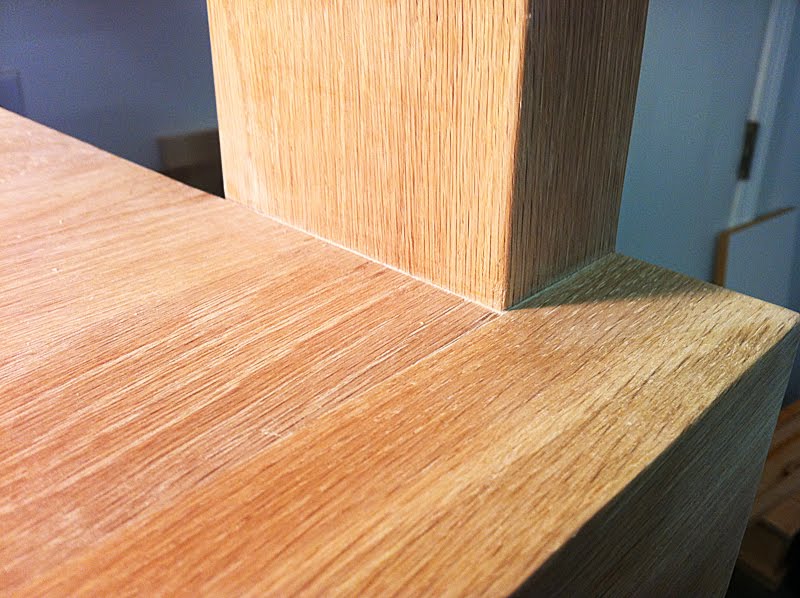
I'm happy to announce the chair is (mostly) complete! I put on a couple of coats of Watco Danish Oil, and let it dry all day. You have to keep wiping the oil off, as it seeps out over a few hours before it's dry enough to sit on. Over the next few weeks I will apply a few more coats of the oil, and do a wet sanding with 400 then 600 grit sandpaper, for a nicer, deeper finish. The finish looks beautiful- a nice satin appearance, and it really shows off the characteristics of the wood.


Whenever I build a project I have an appreciation of just how much work goes into the original. This chair sells for approx. $4,000 US / 2840 EURO. That seems like a lot, and it is, but after building this chair I understand it. I spent about $250 / 177 EURO on the wood and milling, and another $25 or so on the oil, dowels, and sandpaper. The cost of the chair comes in the labor. My estimate is around 40 hours of work on this. All the filing, sanding, finishing, takes a long time, and can be very tiring.

I wouldn't necessarily recommend this project to the novice woodworker. The investment in materials is not inexpensive, and you cannot afford to make a mistake. That means every angle has to be exact, and every measurement correct. It would also be good if you had experience working with dowel points and felt confident to do some heavy duty routing to make the mortise & tenon joints. I got lucky building this, as there were no measurement errors, and nothing went terribly wrong. Some of the angles are a hair off, but other than that it came out nice.

I hope you enjoyed watching, and drop me an e-mail if you have any questions!


Sunday, March 27, 2011

Oiling up

The final sanding is done, down to 220 grit, and every edge and corner has been checked, I'm going to use Watco Danish Oil (natural color) as the stain / sealer. Watco makes a product that's super easy to use, and it's hard to make a mistake with it. It seals the wood, provides a nice satin finish, and is very durable. Here are the before photos, in a couple of days I will take new photos showing how it came out.

Here's the before images


Thursday, March 24, 2011

Wednesday, March 23, 2011

The biggest loser

So while waiting for the weather to warm up a bit before applying the stain, I took the chair and weighed it. Anyone wanna guess.....

37 lbs., 16.78 Kilograms!

Pretty heavy. I could easily defend myself with it, if I could lift it that high. Very dense, very solid.

Tuesday, March 22, 2011

It's getting smooooother

I'm just about finished with the chair. I filled in the joints with wood putty, and sanded everything smooth. All surfaces are sanded with 220 grit, and look great. The wood is super smooth. Tomorrow I will do one last sanding with the vibrating sander, and then run my had over every edge to make sure it's all done.


Next step: one last sanding and then the staining starts....

Saturday, March 19, 2011

The last piece is laid

Today I drilled the last hole in the arm and seat, and glued the dowel in. Aligment looks good.

Dowel jig in place, ready for drilling


Success


Glued in place


Next step is filling hairline cracks, and more sanding

Friday, March 18, 2011

File time

Here's a quote from my previous entry:

"... 1/32 or so between seat and edge, which can easily be sanded smooth"

How wrong can I be? Here's a hint: if you need a good bicep work out, try filing 1/16 off of a 1 3/4 inch piece of white oak. It's tiring. REALLY tiring.


What this picture doesn't show is me clutching my chest, trying to catch my breath


Any ways, I did get it filed down, and the joint looks nice.


I think tomorrow I will finish the rough sanding, and attach the final piece.

Monday, March 14, 2011

Almost there...

Today I finished the drilling for the dowels, checked the depth of the holes, and glued the left edge to the seat. Everything went well. Alignment is good, maybe 1/32 or so between seat and edge, which can easily be sanded smooth.

Left side ready to go


I checked alignment of the dowels before gluing, looks good.


I used my grandfathers bar clamps to hold everything tight, I'm not sure exactly what he built with them, they feel like they're made of iron. They're almost as heavy as the chair!


I will stare at the chair all night, waiting for the glue to dry...

Sunday, March 13, 2011

Final assembly starts

The four pieces of the chair are now glued and ready to be put together. Today I did some filling of small cracks with some putty, and sanded everything with 220 grit sandpaper. I also rounded over the edges just a bit. Once you get to 220, the wood feels very smooth, and starts to really look nice.

Rounding the edges


In the early 50's Rosalyn Garret-Anderson was a pioneer in the woodworking industry. She was single handedly responsible for many innovations, including the Block/Clamp Alignment System. The system incorporates a block, and a clamp, to align wood parts for doweling. There was much debate about the complexity and accuracy of the system, but over the decades since it was developed it has proven itself invaluable to literally dozens of amateur woodworkers worldwide.

Rosalyn Garret-Anderson - picture taken 1951


The Garret-Anderson Block/Clamp Alignment System in use (dowel point shown in the center)


The result- perfectly aligned holes


I tested the fit with some small dowels, and it looks good.